
Today's Tidbit... Football And Vacuum Tubes

This article appeared on Uni Watch a few days ago. Read it here if you did not get a chance to check it out previously.
Over the last year or two, I've acquired a variety of composite football schedules from the 1920s and beyond. The brochures typically provide summary information and list the season schedules for all the NFL, NCAA, or a particular conference's teams for that season. Retailers selling gasoline, auto parts, alcohol, or other products stereotypically purchased by the man of the house gave away the schedules, hoping customers found them handy and would buy more products. The connection between the product and football was often tenuous, though the connection between football and alcohol consumption was tighter than most.
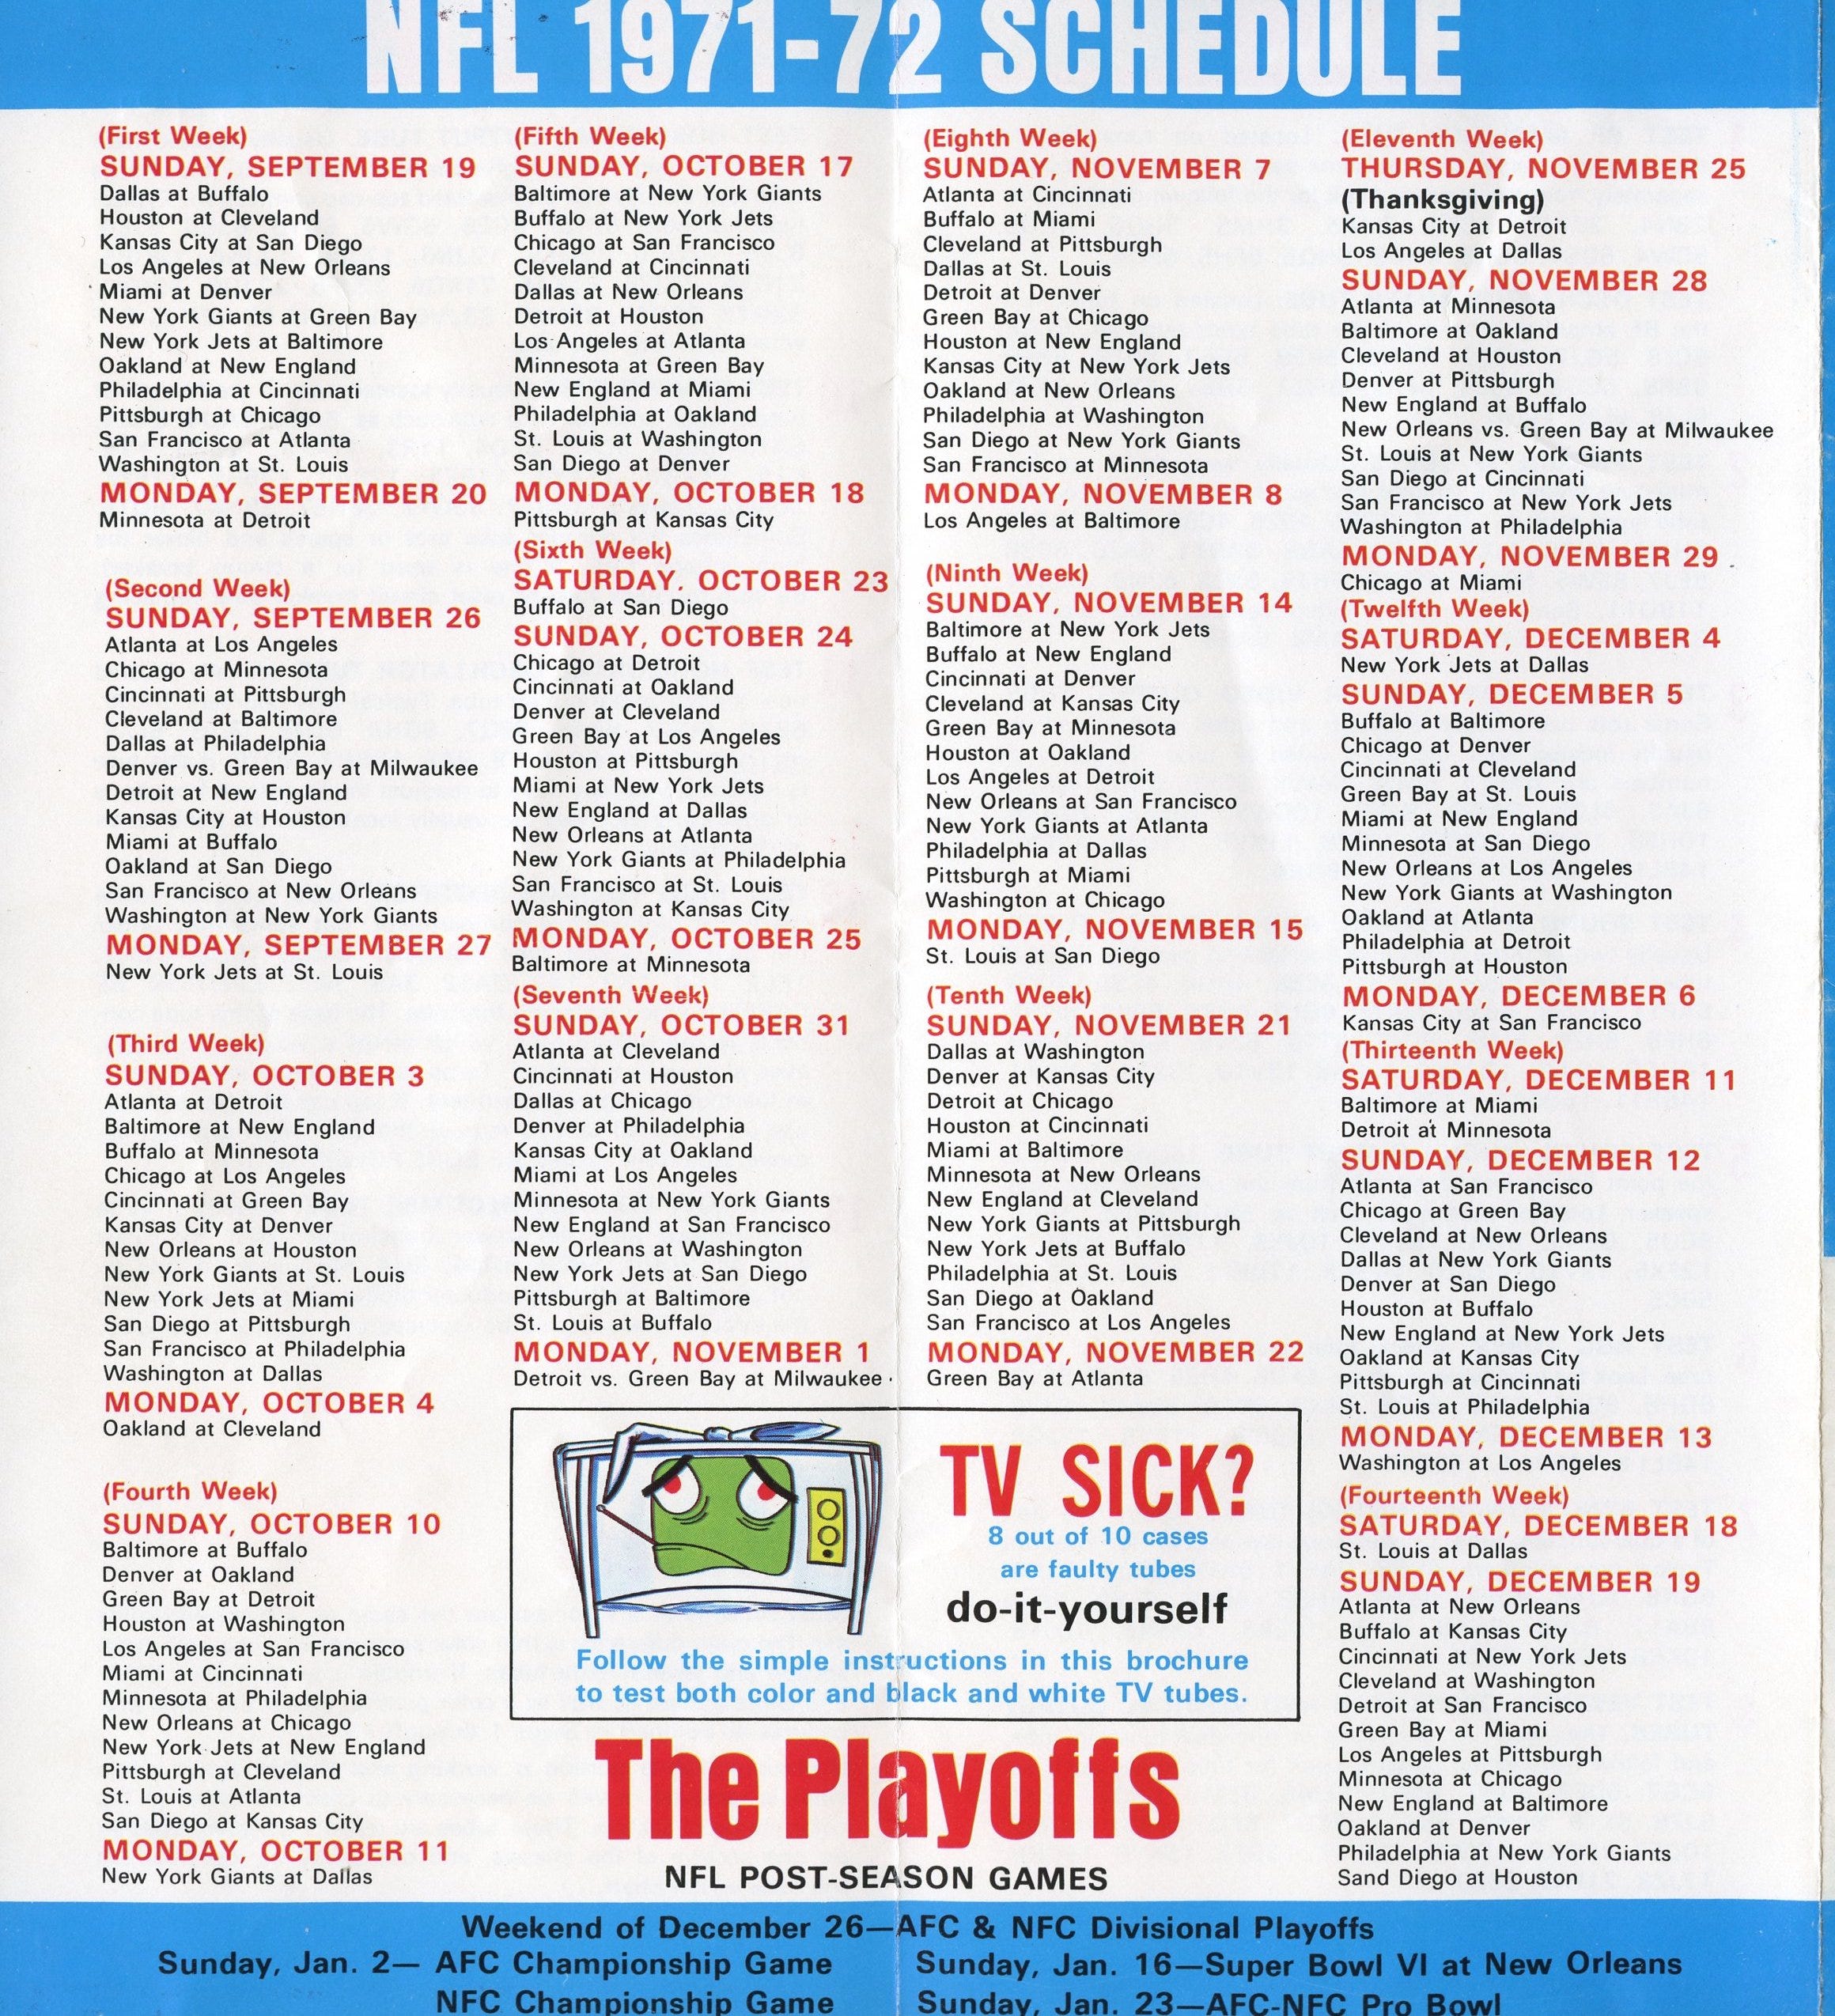
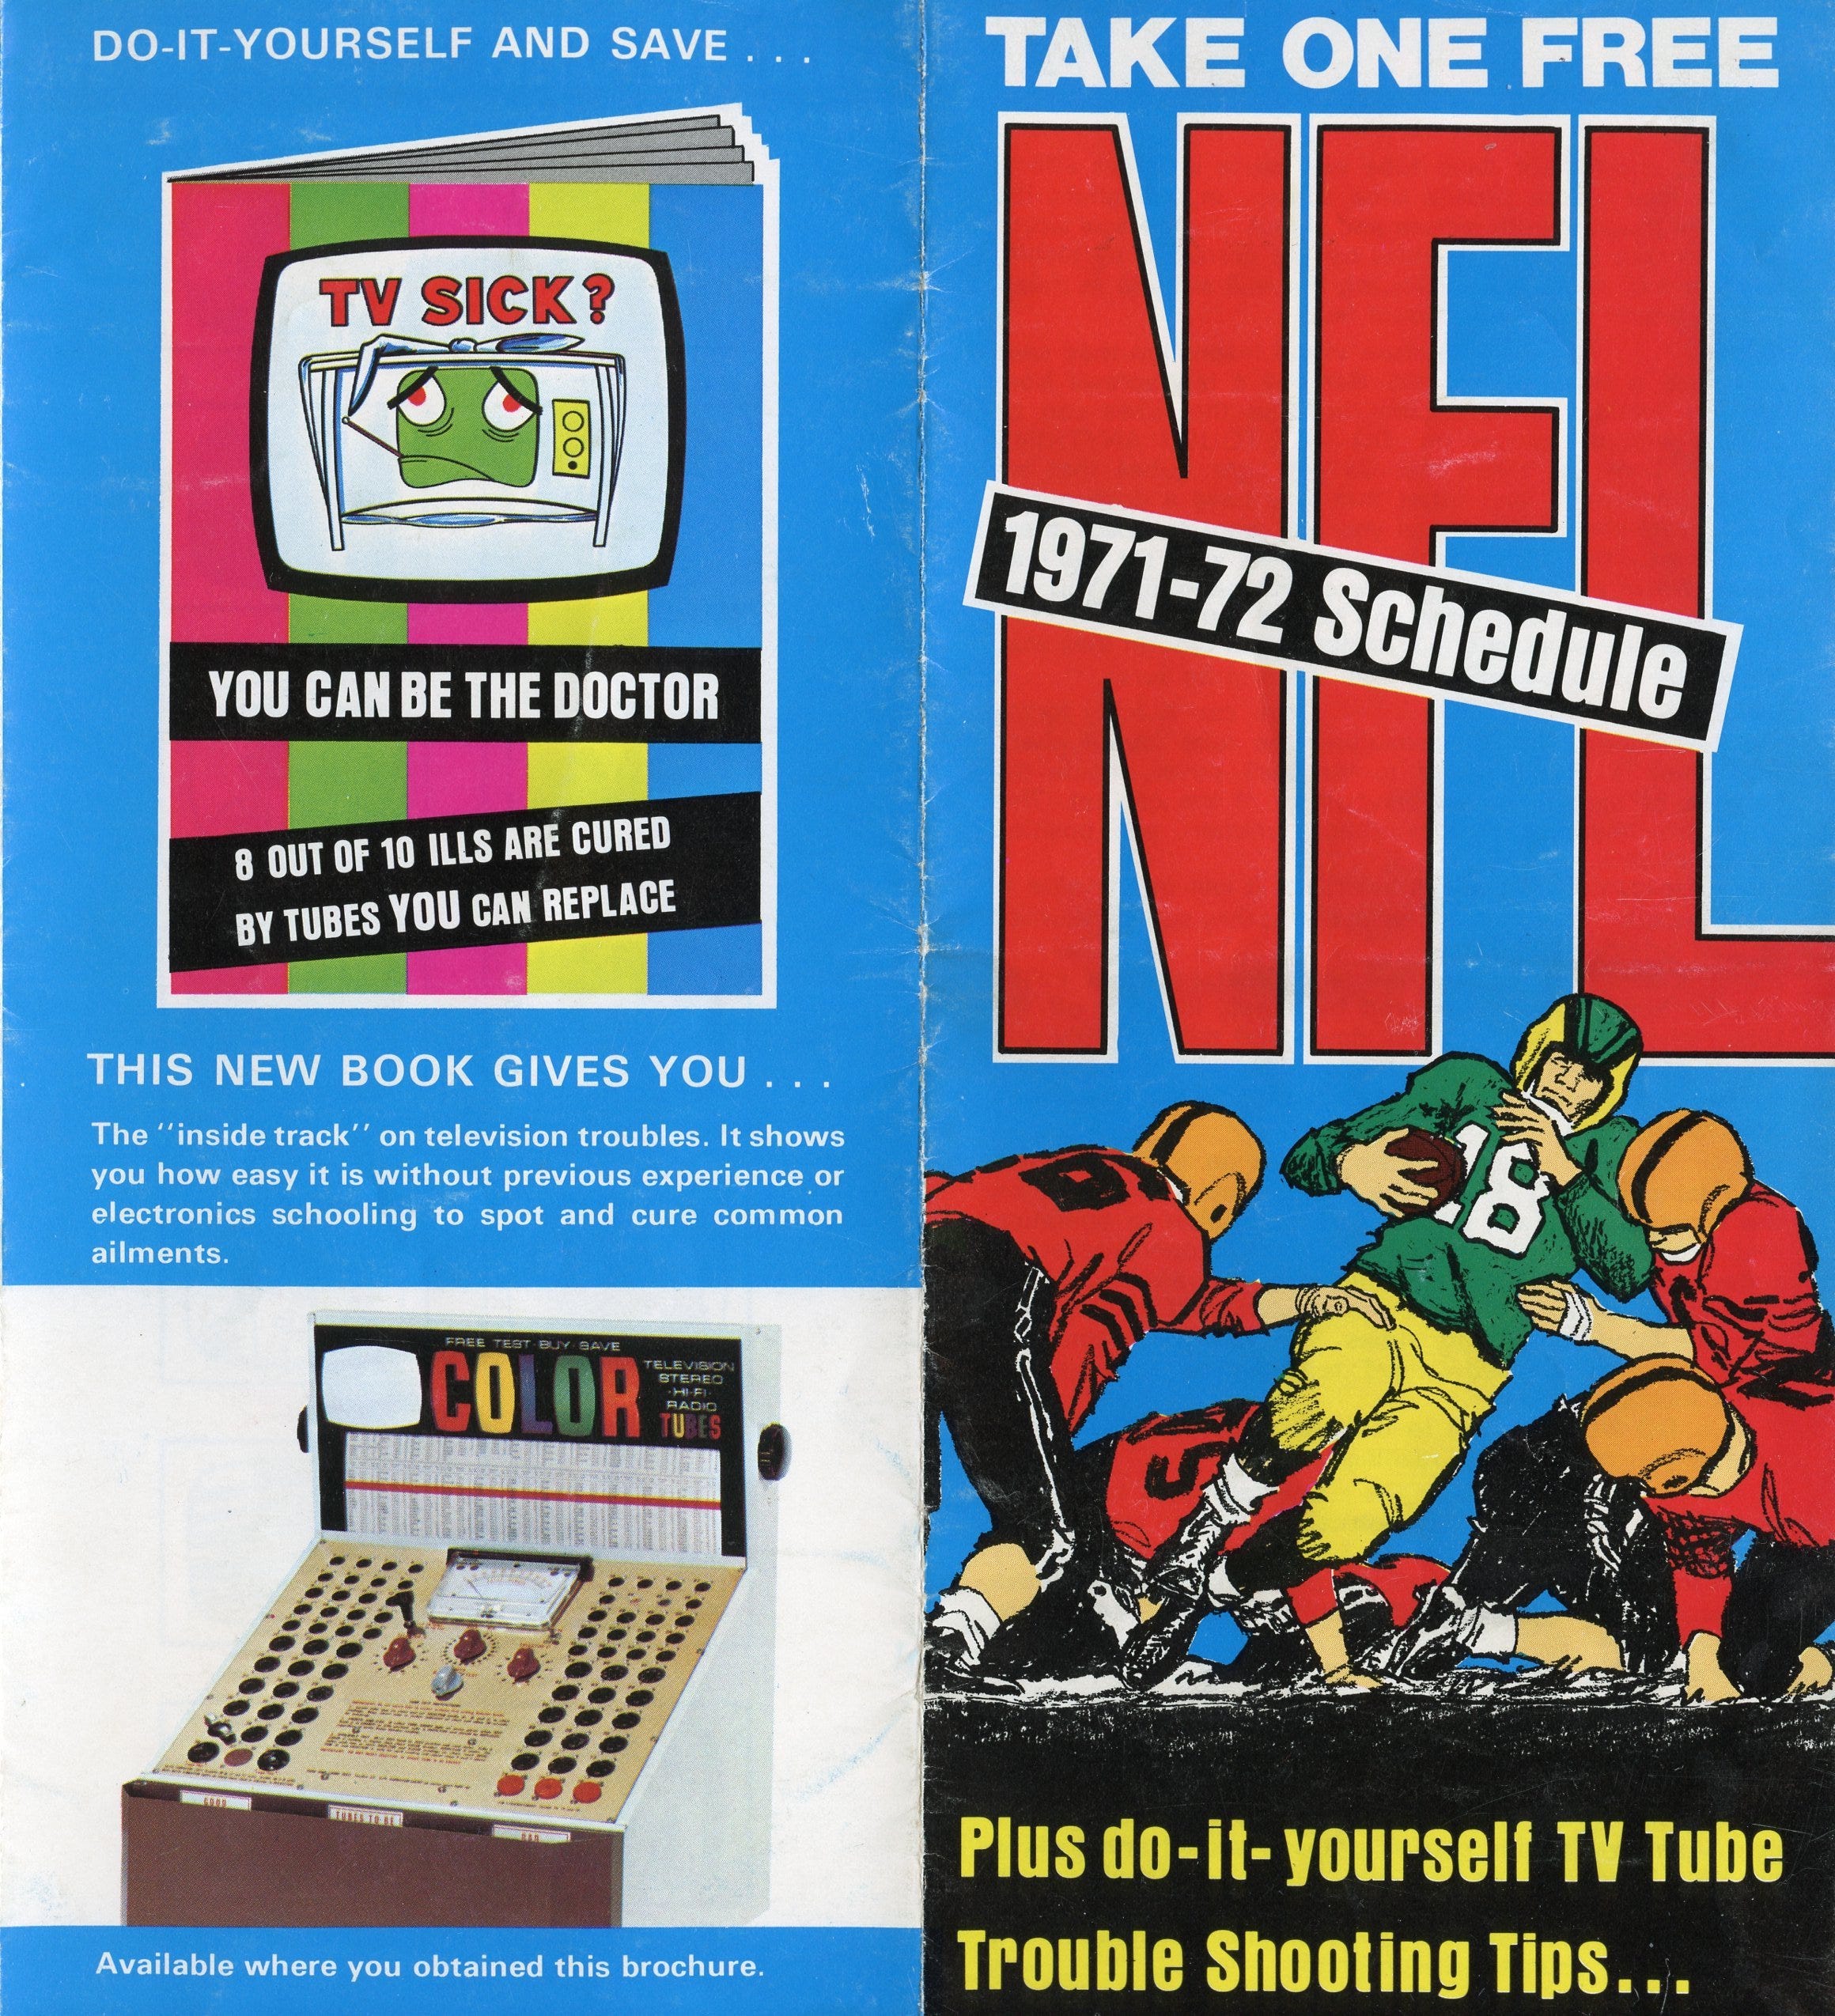
Unlike products only tangentially tied to football, a recently-acquired eight-page foldout brochure promoted a product directly linked to watching football on television: replacement vacuum tubes. Those under a certain age may not be familiar with vacuum tubes, but there was a time when television screens were neither flat nor as large as they are today. They also stopped functioning more often because one of the 15 or so vacuum tubes burned out, just like the incandescent bulbs that once lit your house. The tubes performed a function now handled by transistors, and when one burned out, the TV either stopped working entirely or had substantially hampered sound or display. Thankfully, most adults could fix the problem by replacing the burned-out tube, though the process brought frustrations similar to fixing network or computer glitches today.
Having a TV that worked on demand was more important to college football fans back then because their favorite team appeared on TV only once or twice per season, if they appeared at all. Imagine the horror of turning on your television at kickoff time, intending to watch your favorite team, only to find it not working correctly. That was a true tragedy.
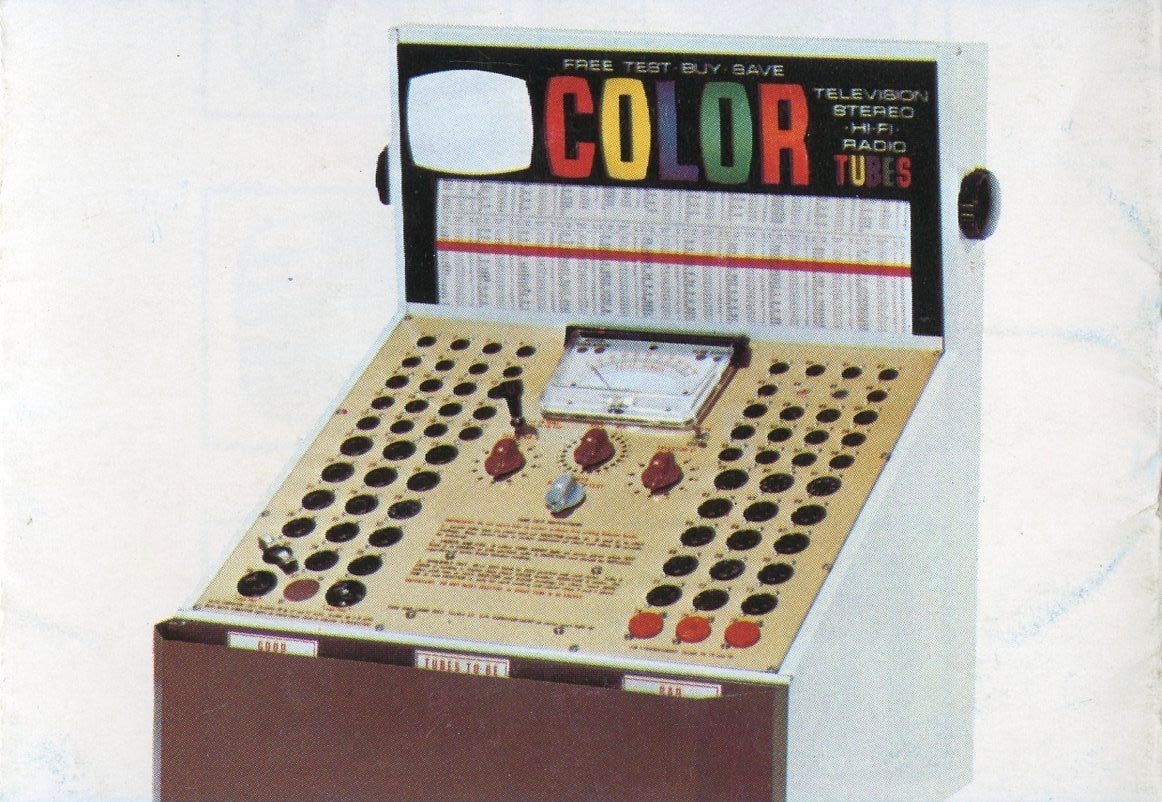
Since televisions of the day could not diagnose themselves, you could not be sure whether the fix required a call to the TV repairman or the simple replacement of a bulb, identified by following the diagnostic steps shown on the inside pages of the brochure. Since specific symptoms were typically associated with the failure of particular bulbs, you could often isolate the problem to one or more bulbs. The next step was to remove the offending bulbs and take them to a nearby hardware or drug store for testing, where you could find the testing machine in the back recesses of the store.
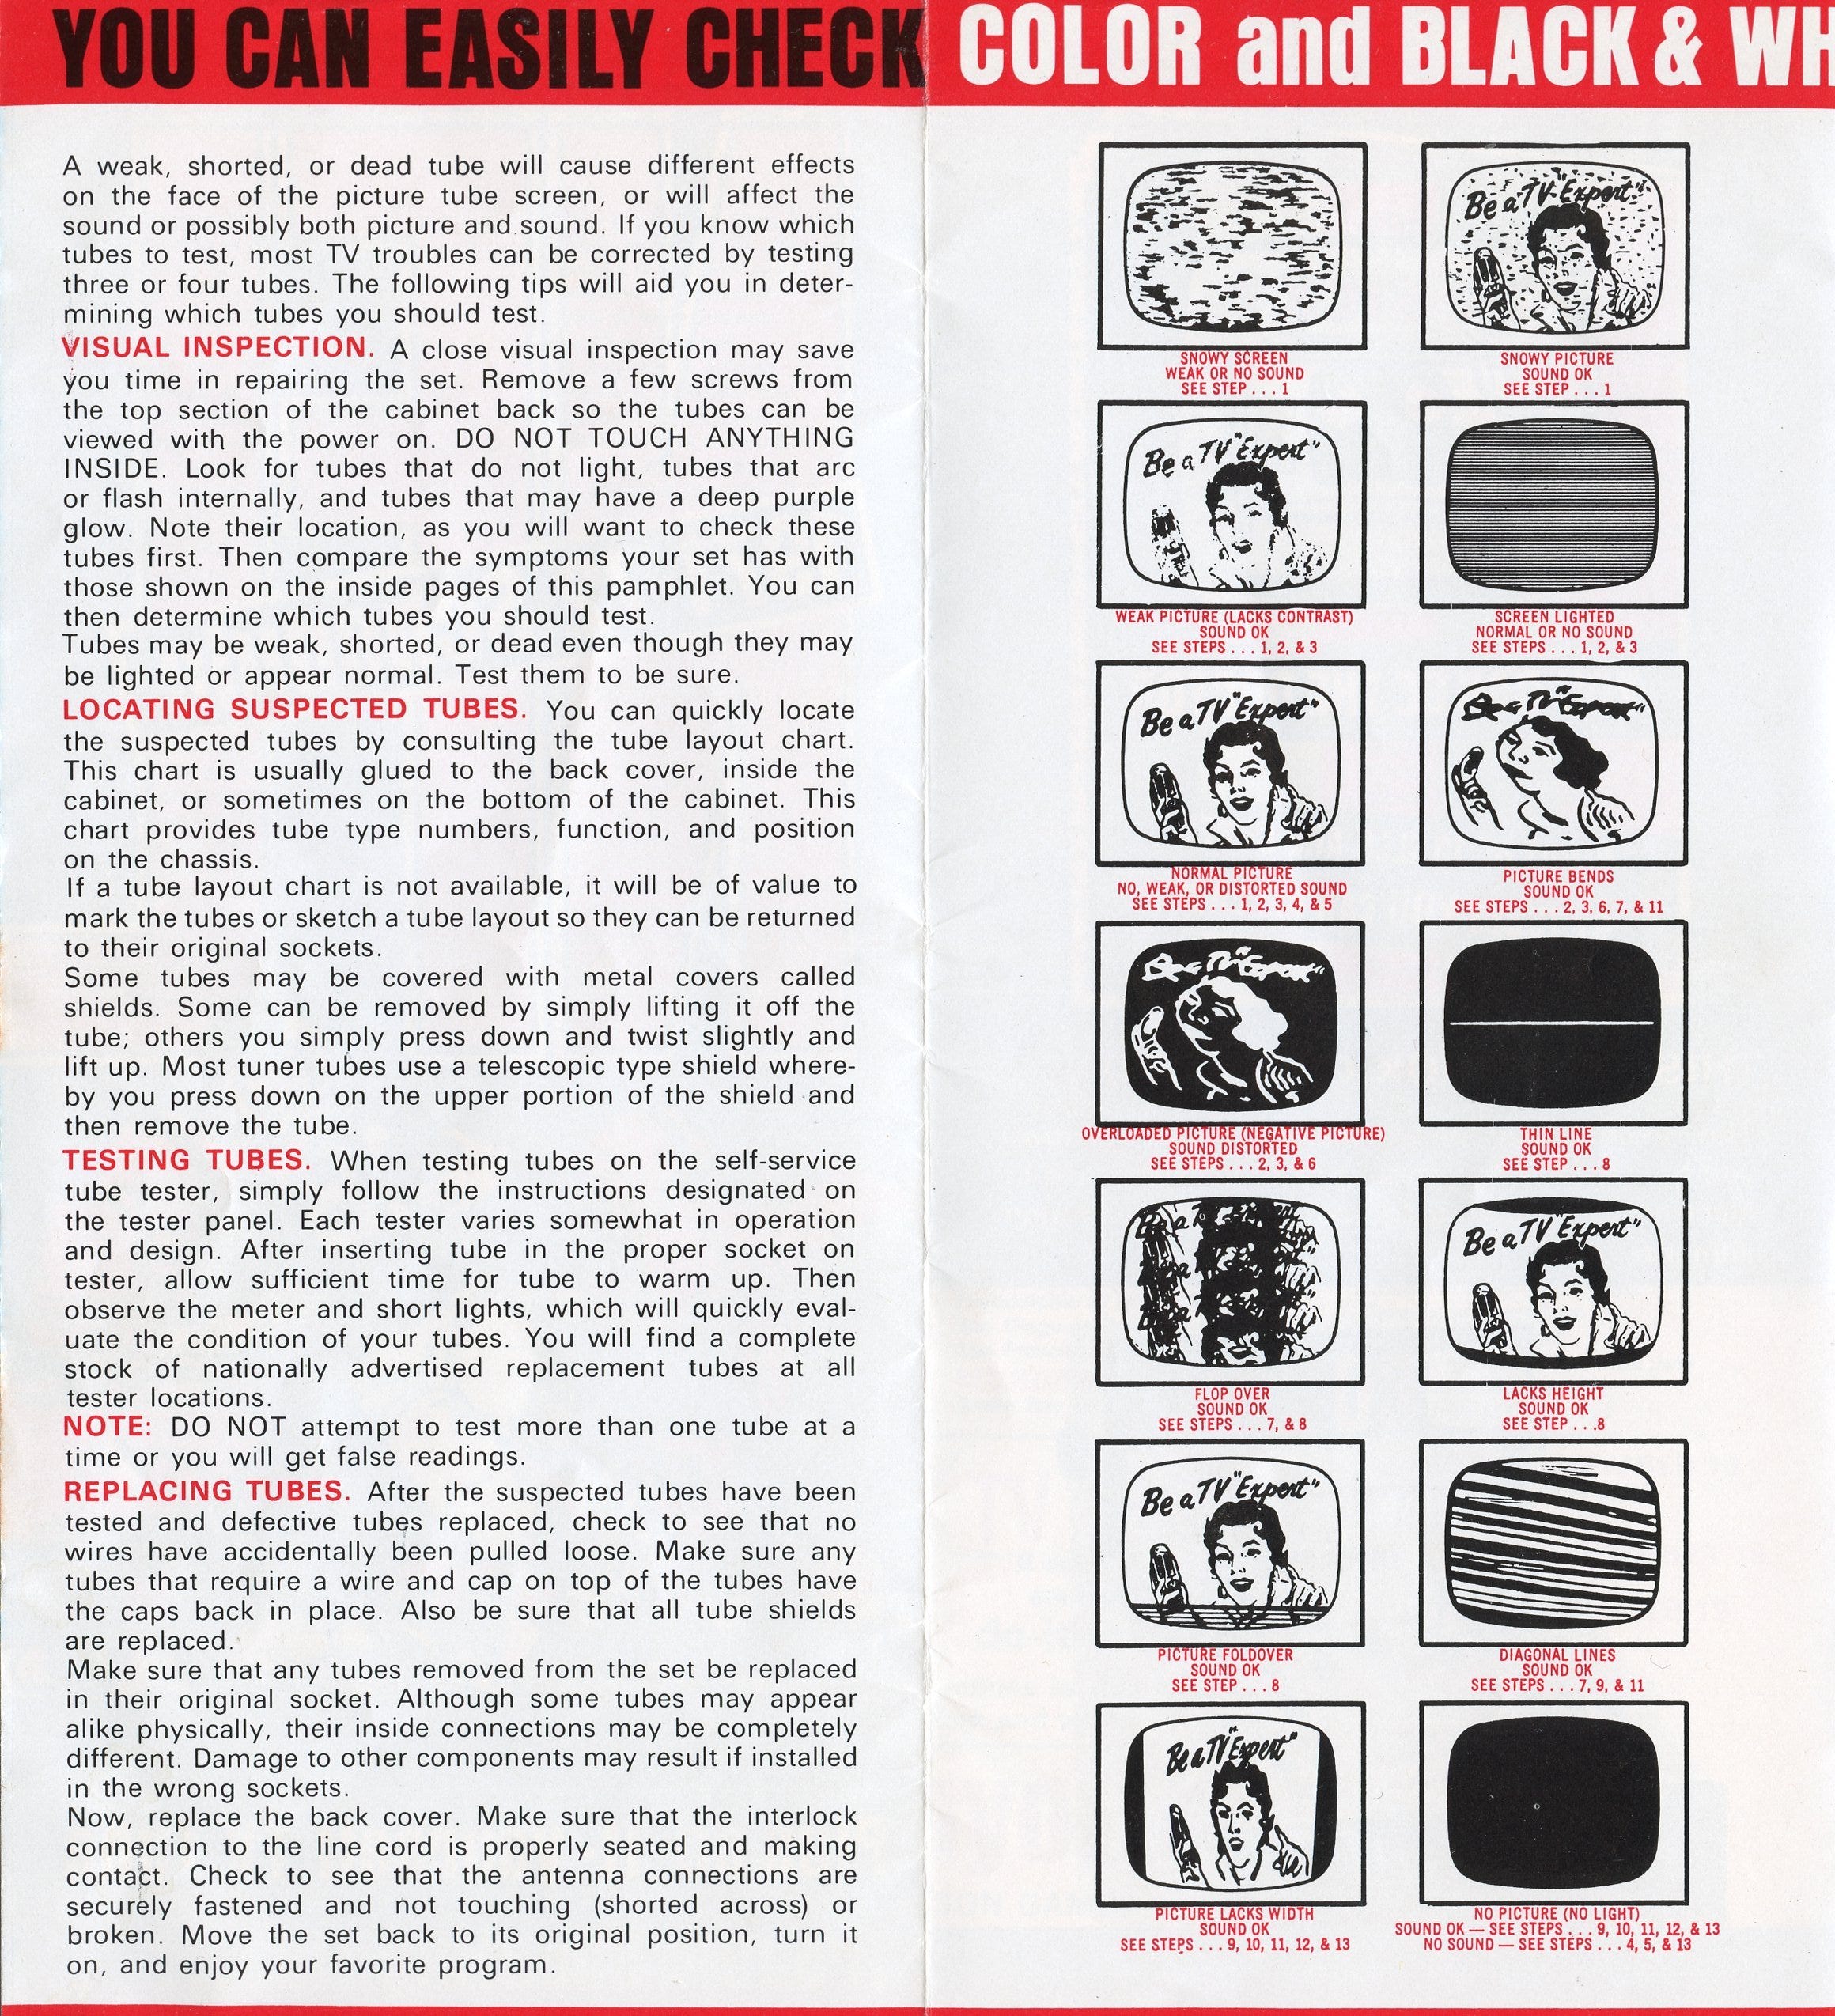
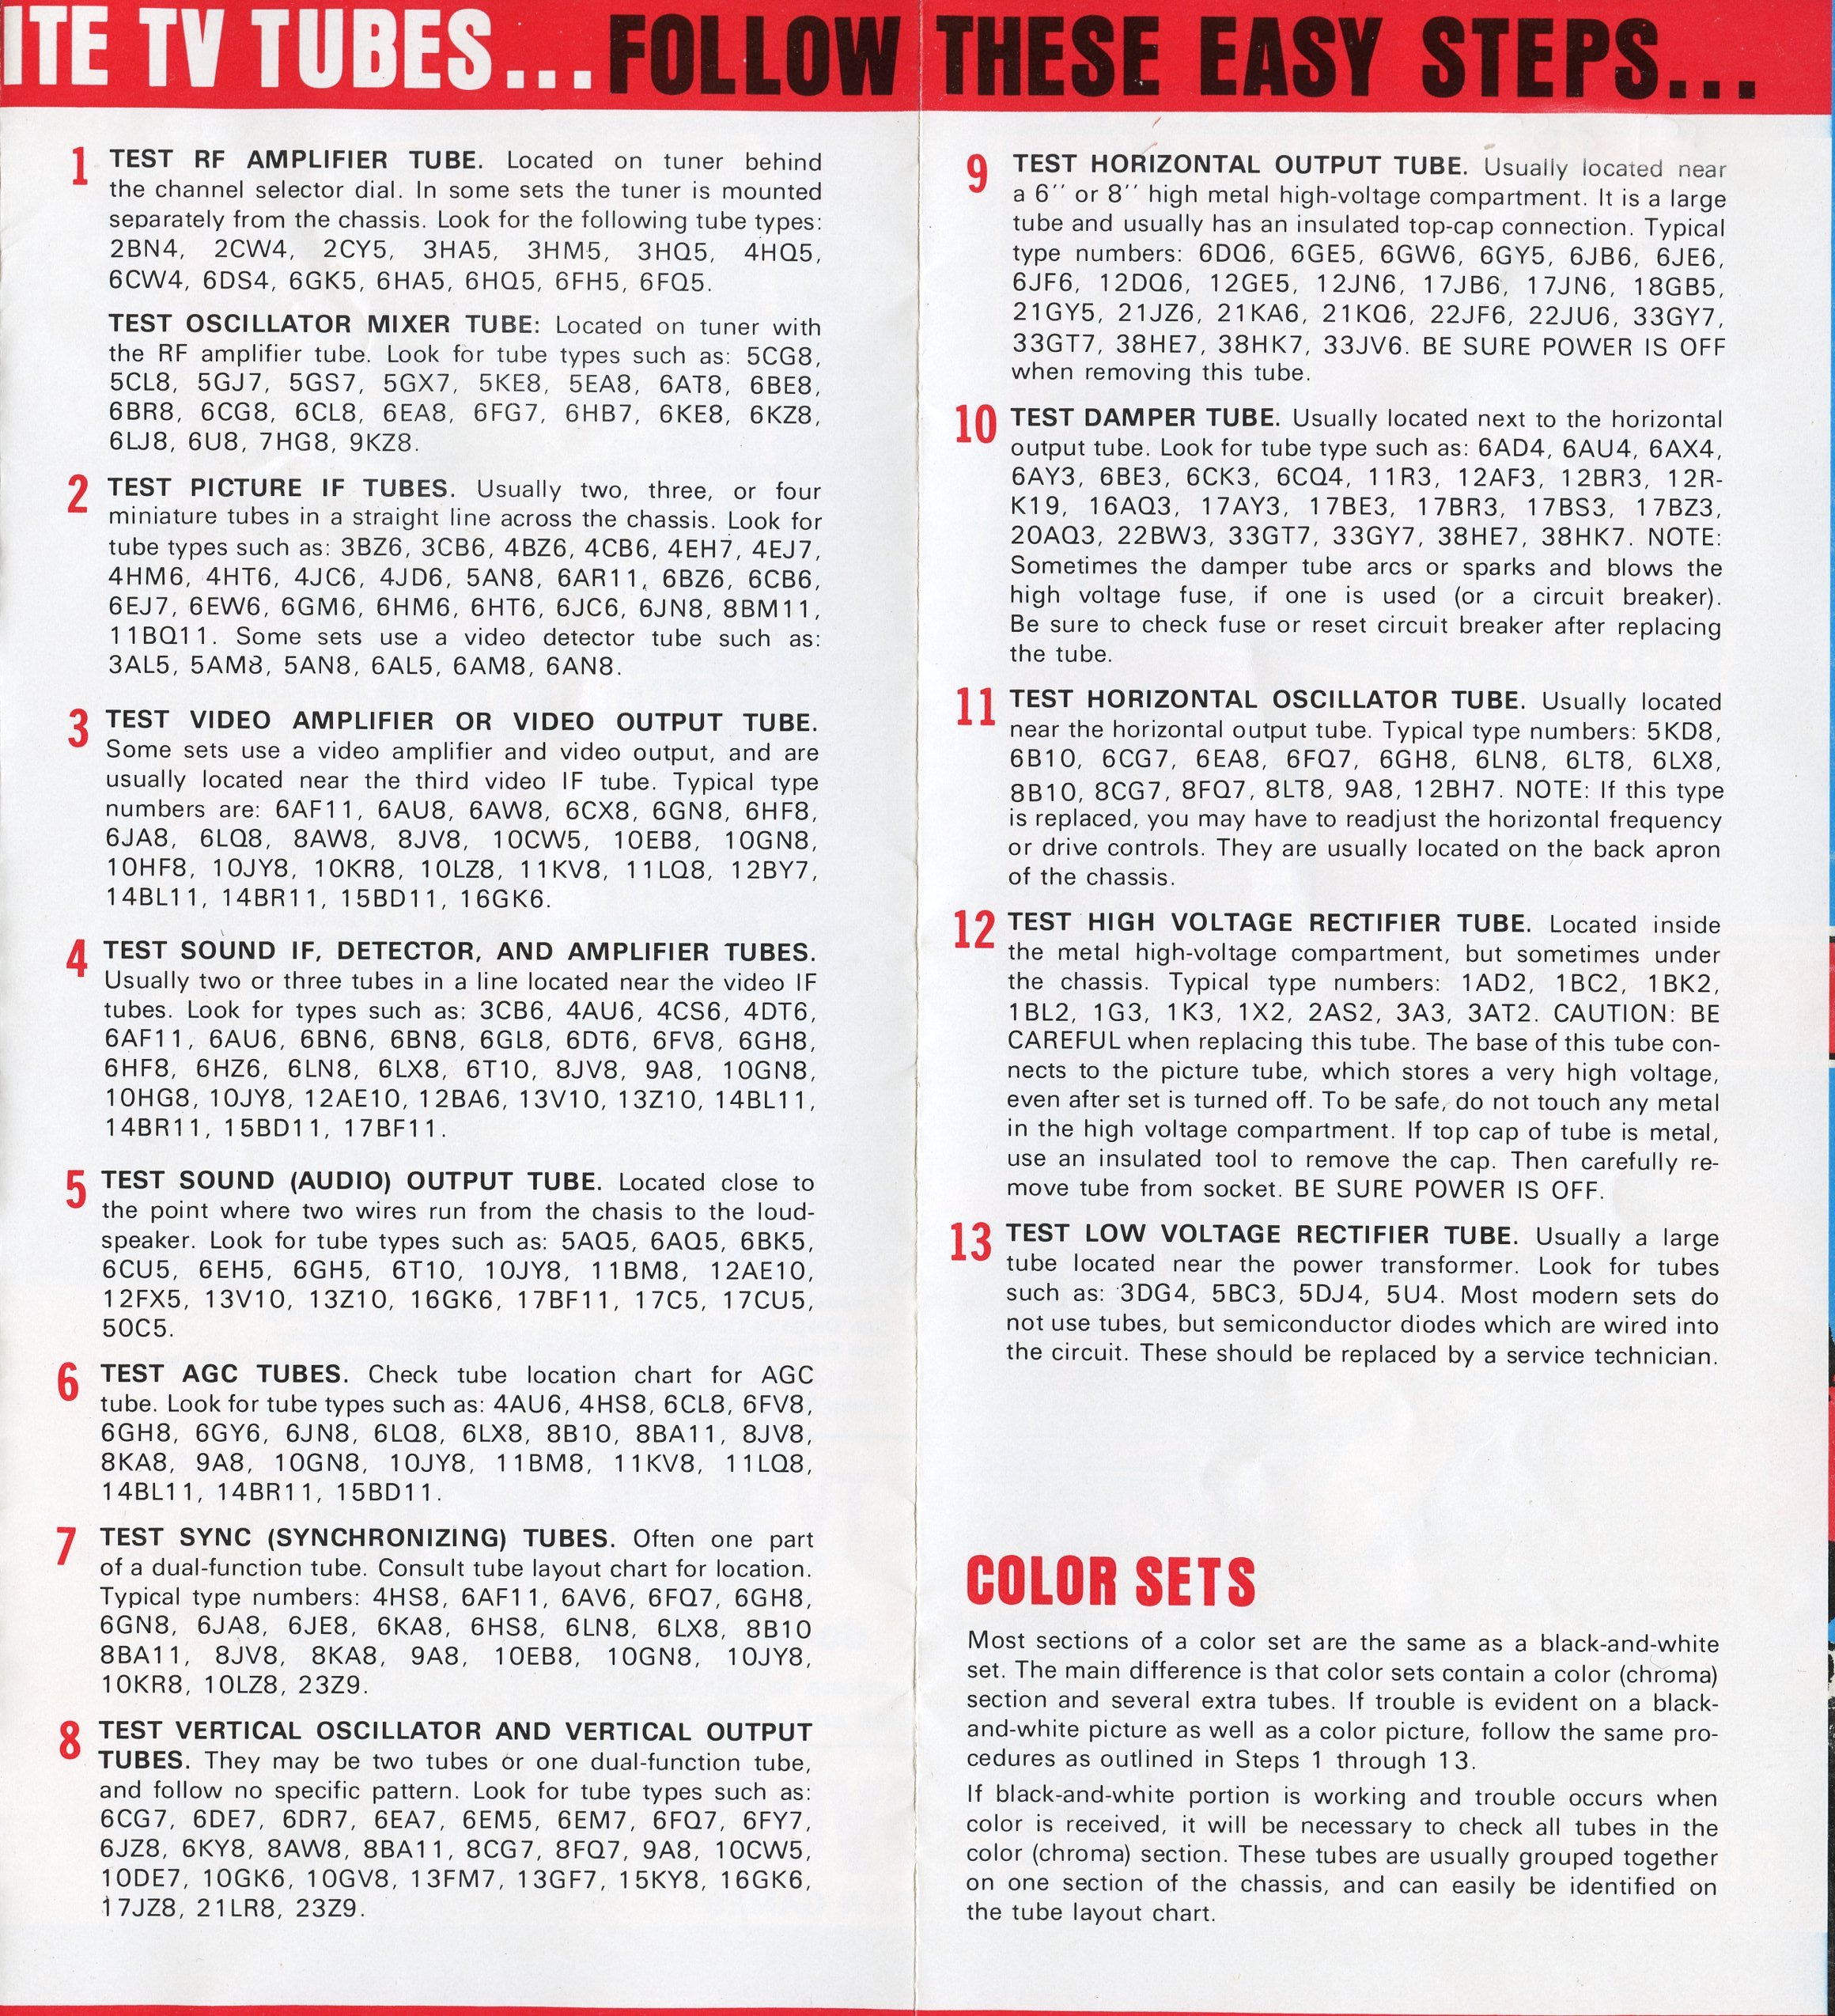
Testing for an offending bulb involved plugging the bulb into the corresponding slot in the machine (see the columns of black slots below), allowing the bulb to warm up, and pressing a button to determine whether the bulb functioned properly. Ideally, one of the bulbs proved dysfunctional, allowing you to purchase a replacement. Then, after returning home and plugging the bulbs back into the set, everything worked properly so that you could enjoy the second half of the game with a nice cold beverage in hand.
Click here for options on how to support this site beyond a free subscription.